Looking for the Burmester audio mod? www.w205audio.wordpress.com
This write up details a DIY upgrade path for the stock Audio20 (Non Burmester) audio system in the 2015+ Mercedes C Class, designed and installed by MBWorld member Vladarh. All W205/S205 C Class that did not receive the upgraded Burmester sound system got the Audio 20 (A20) as standard. As is, the A20 leaves a lot to be desired. It sounds thin, overly bright and harsh, and sorely lacks a low end. This mod involves DIY installation of a compact plug-and-play multichannel DSP amplifier. A DSP (Digital Signal Processor) digitizes the audio signal so it can be manipulated for equalization, time correction, level and band pass filtering. Speaker upgrades, especially for the front doors, is also recommended, but the DSP amp is an important first step.
The A20 system consists of (4) 4″ speakers in the doors and a single 6.5″ Frontbass subwoofer installed in an 8” enclosure located in front of the passenger footwell, all powered by the head unit manufactured by Mitsubishi (versus an external amp like the Burmester gets). They are connected to the head unit (HU in further text) through what is commonly known as a BMW 40-pin connector.
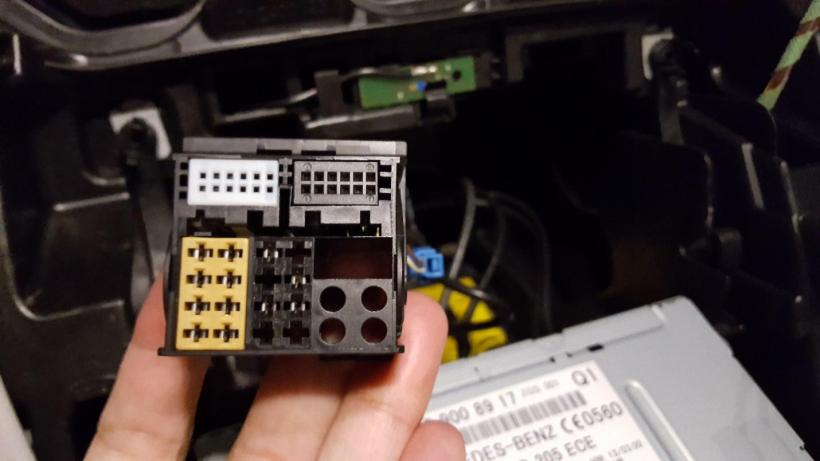
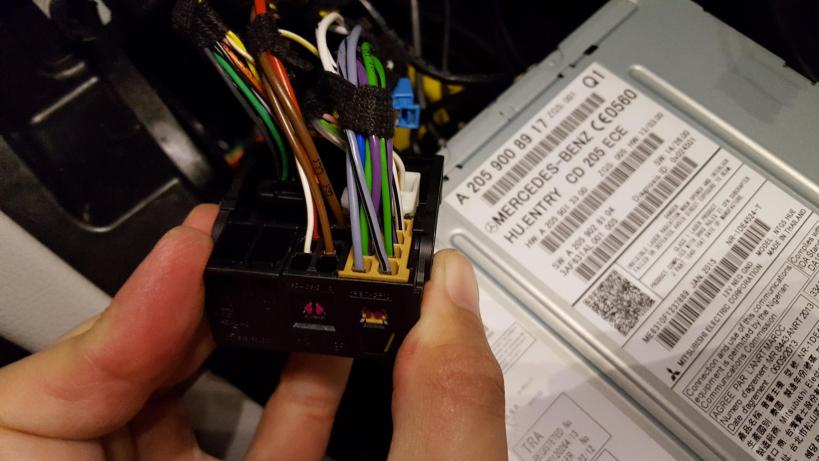
The connector going into the Audio 20 head unit
The connector is the same as in the W204 C class so the cables and adaptors made for the W204 should work on the W205. The yellow part of the connector (essentially an ISO integrated into the 40-pin) houses the speaker connections. There are five pairs of wires going out of the ISO part. The four door speakers are connected as in any other four-channel configuration. The subwoofer (if we can call a 6.5” that) is bridged to FL+ and FR- connectors (sub – violet, FL – green, FR – blue).
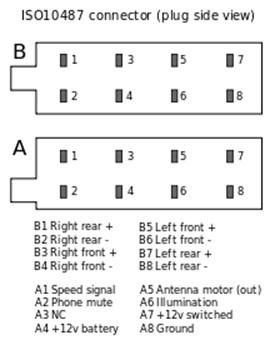
Standard ISO connector
Speaker out connections – grey RL, green FL, violet SUB, blue FR, white RR
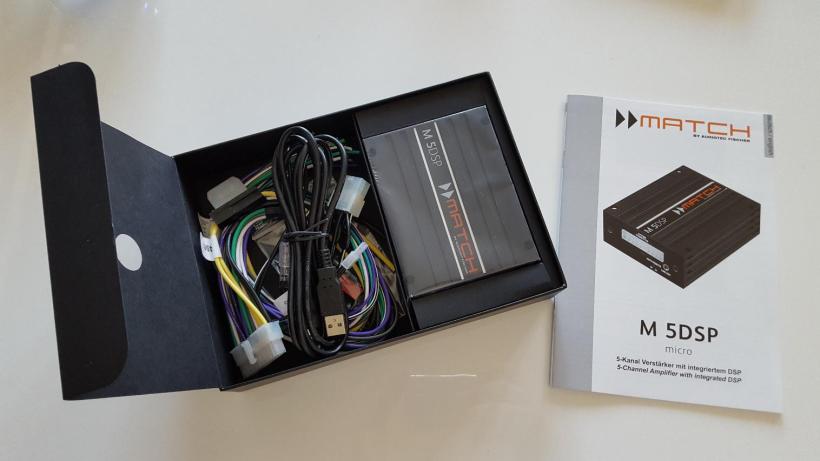
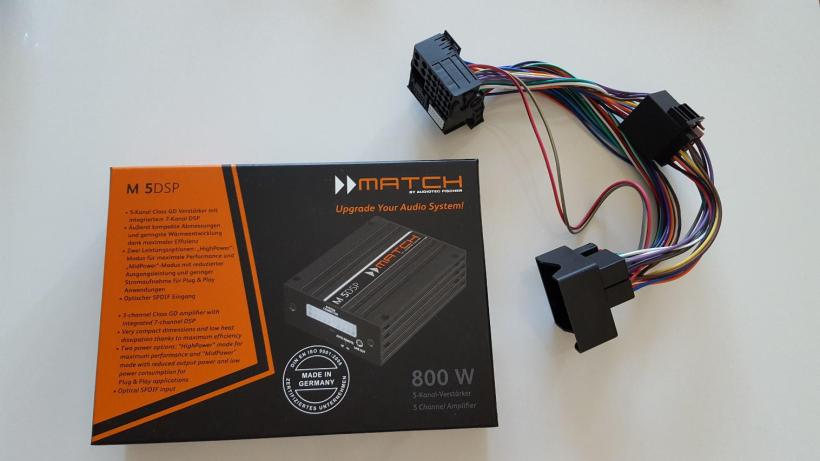
To perform the upgrade I decided to install a 5-channel Digital Signal Processing amplifier Match M 5DSP made by Audiotec Fischer. The main reasons were its compact size (35 x 85 x 110 mm / 1.34 x 3.35 x 4.33”) and the fact that the manufacturer also offers a set of plug & play cables fitting the HU connector. The following needs to be purchased:
- 1 x Match M 5DSP amplifier
http://www.audiotec-fischer.de/lng/en/match/products/amplifier/m-5dsp.html
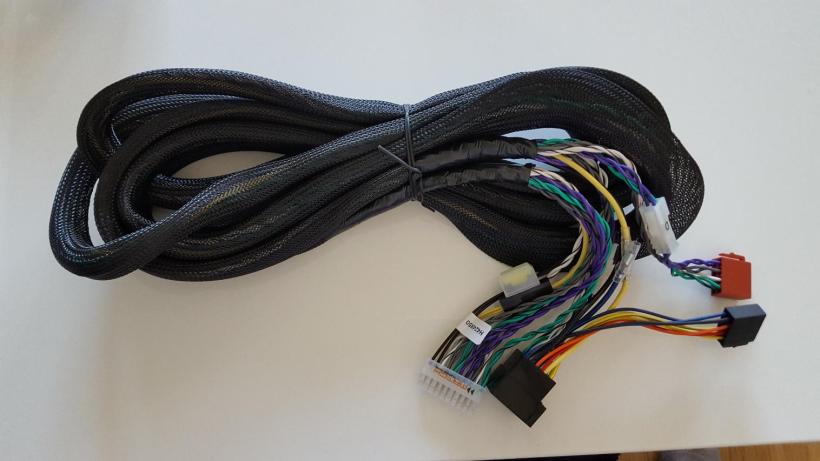
- 1 x PP ISO cable harness (available in 1.0, 2.2 and 5.0m lengths)
http://www.audiotec-fischer.de/lng/en/match-pp-iso.html?type=N
- 1 x PP-AC 13a Plug & Play cable harness adaptor
http://www.audiotec-fischer.de/lng/en/match/adaptor-database/
According to the manufacturer the harness adaptor cable does not work on the W205 but I installed it without any problems. Everything works and all the stock functions have been preserved.
Accessing the HU is not difficult. The entire center console can be removed as one piece. The procedure can be seen in this video:
https://www.youtube.com/watch?v=WK_pGmopebk
I would recommend taping up all of the edges with protective tape before removing the console, as I managed to scratch the leather on the lid of the central compartment. The first part to be removed (shiny piece with the button for opening the compartment) is the most difficult. I advise patience and a wide blunt tool.
The first step after removing the HU from its supports is disconnecting the stock harness and connecting the PP-AC 13a. As I was testing it and did not know what to expect I connected its ISO male and female connectors and used it for a while as, basically, an extension cable. Tip: the Audio20 system does not work until you reconnect the center console (goes into protect mode after several seconds).
If you decide to connect all the components straight away, the next step is to connect the PP ISO to the PP-AC 13a by connecting the appropriate male to female ISO connectors (only one way to connect – no mistakes possible). Before you connect these, you will need to pull the PP ISO’s ISO connectors through the opening under the glove compartment. The PP-AC 13a stays inside the center console (hidden in the hole under the HU) and the PP ISO remains outside, together with the amplifier. I secured these two to the plastic cover under the glove compartment – easy to access and not in the way.
The other side of the PP ISO cable is the Match connector that goes into the amplifier.
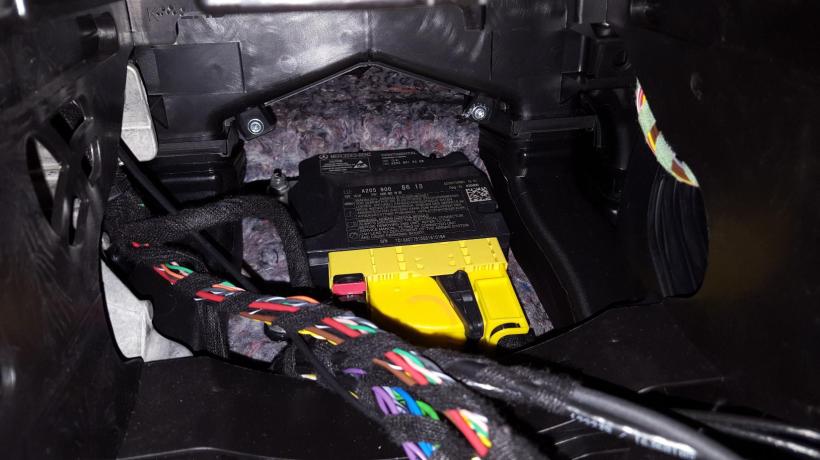
Space under the HU where you can fit the extended harness with the PP-AC 13a cable, and the gap on the right where the subwoofer cable and the PP ISO cable go out
The only part of this installation that isn’t P&P is connecting the Frontbass stock woofer to the amplifier. The woofer is connected to the HU by a 5th pair of wires connected bridged to the stock harness ISO part (explained above – violet wires). In order to connect the woofer to the new amp you will need to cut these wires and install a simple round connector on each of them (male type) – on the side going towards the subwoofer. Tip: don’t forget to insulate the wires coming out of the stock connector – they will still be powered, but are not needed.
The Match amplifier comes with a short subwoofer cable that plugs into the amplifier on one side and has a pair of female connectors on the other. There’s also a small extension to the subwoofer cable that plugs into the female connectors but this is only for Match subwoofers and isn’t needed for this installation.
The final step is connecting the Match subwoofer cable to the amp and to the connectors that you made on the stock wires going towards the subwoofer.

The Match connector cable that comes with the amp (not needed for this installation), the USB cable for connecting the amp to the laptop, fixing screws and the subwoofer cable
When everything is connected, the system should look like this:
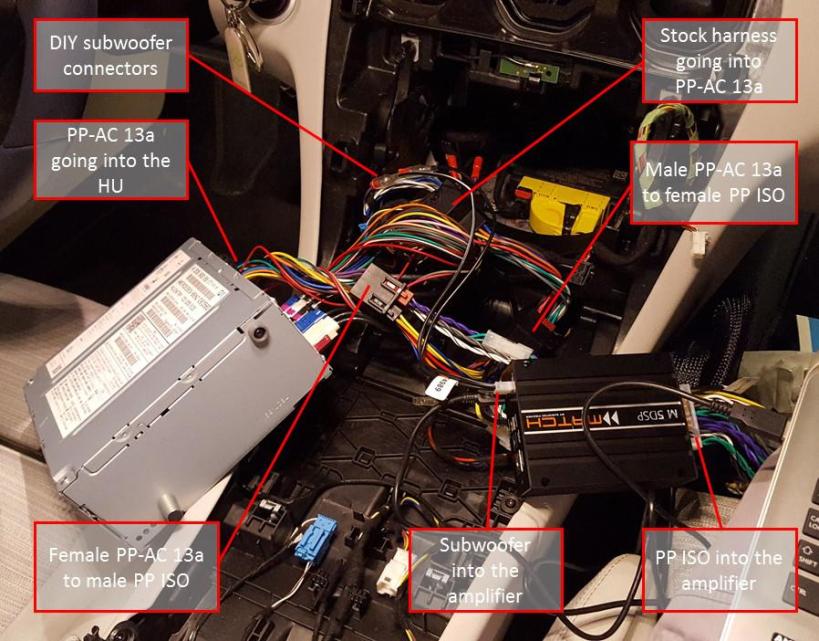
Test connection of all components – final setup features the PP ISO cable and the subwoofer cable hidden under the glove compartment
When you connect all the parts, you will need to reconnect the center console in order for the system to work. Before fixing it in place, it is a good idea to test the unit. If everything is connected properly, the small light on the amp will light green and you’re good to go. Don’t worry if the music sounds bad (and it will), as you still need to do the DSP setup in order to get all the speakers to perform as they should.
As a prerequisite to this upgrade, it is assumed that you have already installed a set of full range speakers to the front doors (coaxial or component). You can find a guide on how to install the Focal 100KRS system in the post related to Burmester system upgrade on this blog. This is the system that I used as well, and the one that the DSP setup is made for. Of course, any other full range set of 4” speakers can be used, but the setup may need to be adjusted for it.
When you first start the amp, connect it via the USB cable to your laptop with the DSP PC-Tool installed (not sure whether it works with Mac):
http://www.audiotec-fischer.de/cms/lng/en/dsp-pc-tool-v3.html
The setup consists of setting the speaker high and low pass filters, choosing the appropriate channels for input and adjusting the EQ (necessary in a car – a small environment with a lot of highly reflective surfaces). I also changed the automatic shut-off time to 10sec, as the car already has a delayed shut-off for the media system (after I lock the doors it takes approx. 30sec for the amp to shut down). You can find a good setup guide at the Audiotec Fischer website:
You can see the settings that I used for my system in the pictures below. If you don’t want to go through the whole process you can download the setup file that I made and just load it into the amp. It’s always possible to make adjustments to the setup even if you load my settings. I would advise everyone to adapt the sound to his or her liking and save the settings to an external file. I’m still getting some minor distortions at higher volumes and will be updating the file as I go along. Also, as a further development of the blog I plan to install a new subwoofer and will upload a new setup for that system as and when it is installed.
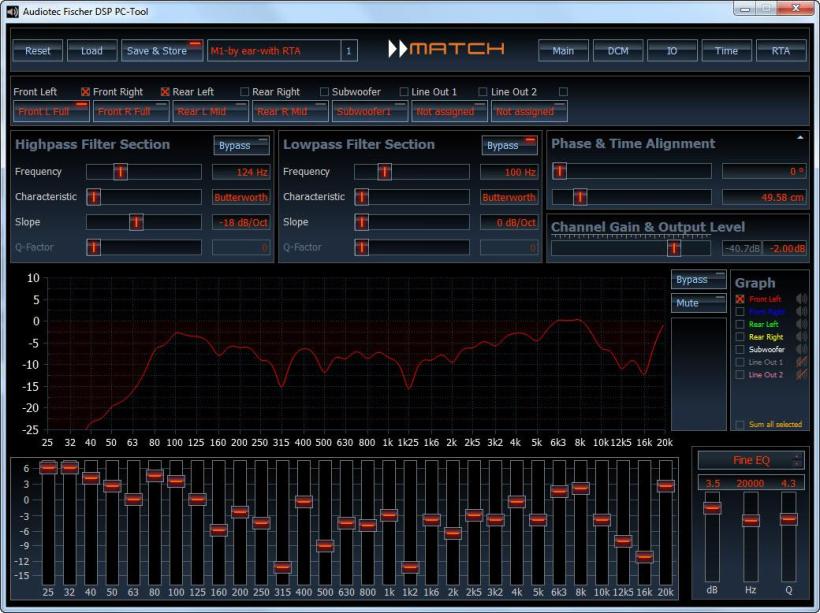
Front Speaker Setup
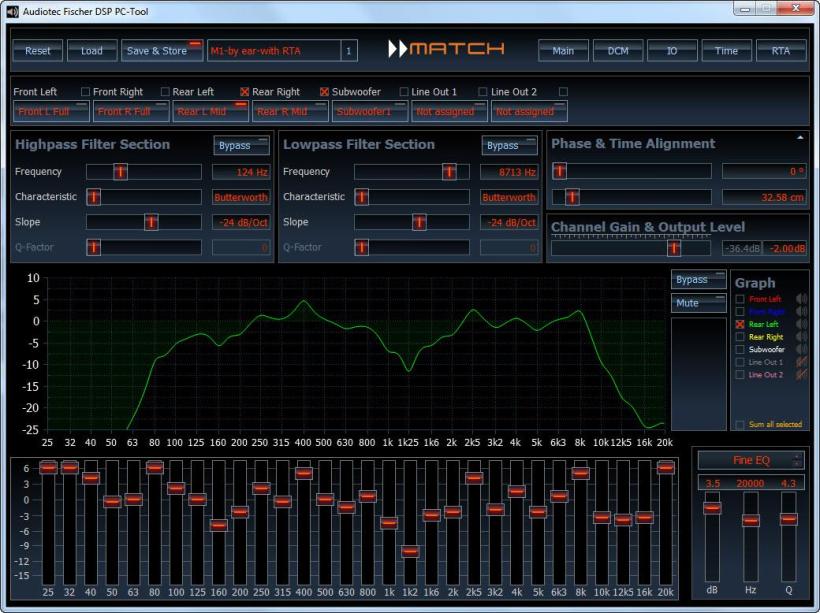
Rear Speaker Setup
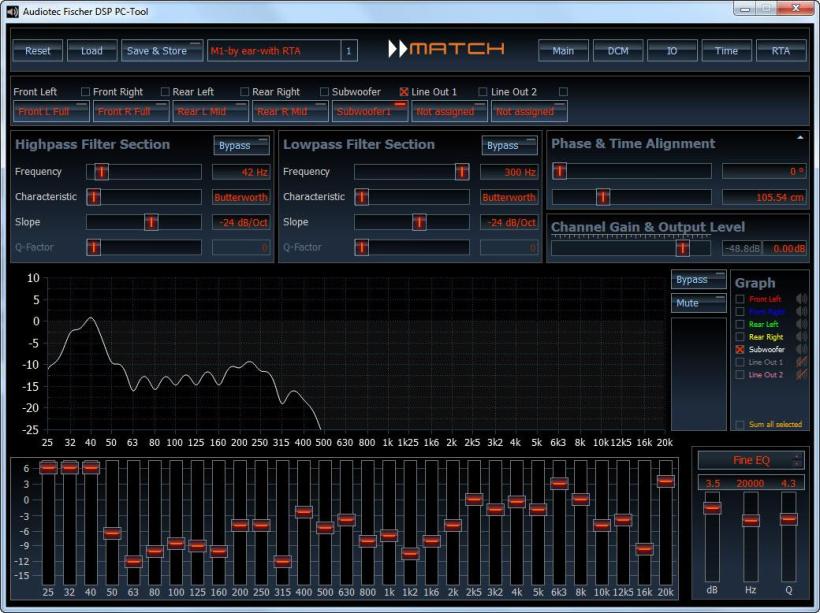
Subwoofer Setup
